In my continuing effort to preserve my Grandmother’s negatives, I’ve learned a few things that I thought might be helpful to other genealogists.
When I was first given the negatives, my goal was to find a way to see what was on the negatives in order to see which would be the most useful to have printed. Because the negatives were not 35mm film, I was having a hard time thinking of an “easy” way to see the negatives. I could hold the negatives up to the window and because a good portion of the negatives were of photos I’ve seen in family photo albums, I could tell who the subject of those photos were. I was most interested in the older, black and white negatives. Some of those negatives were from before my grandparents had children and I was pretty certain that some were of photos that my family has never seen before.
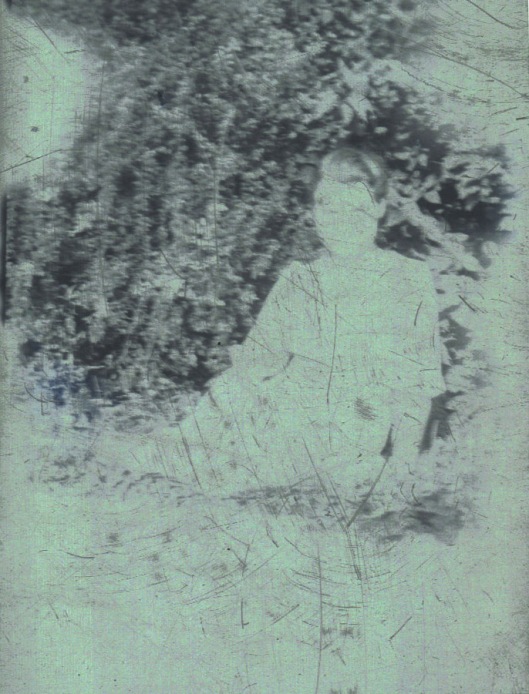
After researching negative scanners and finding none that would scan the format of negatives I was looking at, I decided to try scanning the negatives without any attachment. I figured that at the very least, the negatives would be larger on my screen and easier to see. Then, my daughter showed me how to invert the colors on the negatives to see the actual picture. I was thrilled! But some of the photos were too scratched to get a good image from.

My grandmother - scanned negative
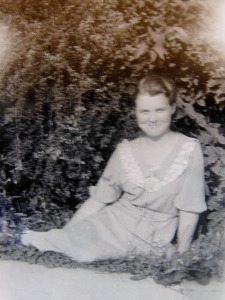
I could tell that this image was my grandmother as a teenage, and I was incredibly disappointed that this photo did not turn out. Later that evening, I was sorting the negatives into photo album pages to try to get them organized so that I could quit shuffling them around and damaging them further. To see the images, I was holding them up to my computer screen with a blank page in Microsoft Word. I was telling my son about my problems with the negatives and how I thought they’d scan better if I could get light from BEHIND the negative instead of front as the scanner was doing. I asked him if he thought it would work for me to use my digital camera to take a picture of the negative taped to my computer screen and we decided to give it a try. What a difference!

Vesper - digital image of the negative
I did a test run of a couple of negatives and then noticed that some of the photos had a pattern imbedded in them. They almost looked like the photos were taken through a window screen. I realized that the pattern was the texture of my computer screen! I gave up for the night, but couldn’t stop thinking about how I could fix this. I thought I could put a sheet of white paper behind the negative before taking the photo, but I could not find any white paper that was truly white. The mottled appearance of the paper (only visible when held up to light) made the negatives look dirty and spotted. So I decided to gently tape the negatives to my window, which worked great for getting rid of the texture, but there was a color variation in the images that I figured out was my camera seeing sky above trees above grass through the negative. Not something I could notice when looking at the negative on my camera display, but certainly noticeable in the inverted image. After some trial and error, I ended up stretching a white sheet in front of my window to take care of the background issues. I used the macro lens on my camera with no flash and was quite happy with the results! My lens was approximately 2 inches from the negative.

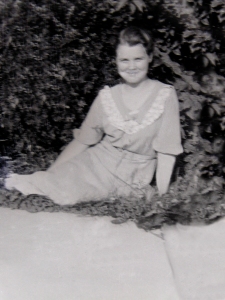
Final version - a little touchup with Photoshop
Here are some other things I learned:
- The sun cannot shine into the window. It causes some areas of the negative to appear lighter – like the flash was too bright – because the light is not evenly distributed.
- The sheet cannot be rippling at all. It causes differences in the color that make the negative look dirty.
- One side of the negative is shiny and other other is not. If the shiny side was facing me, I could see the reflection of the camera and my hands in the image. The only drawback to this was the all of the images were reversed. An easy fix in Photoshop.
- I attempted to take photos of the negative through the clear photo album pages I have the negatives stored in to avoid touching them, but again, I had issues with reflections. I went back to taping the negatives to the window. I allowed the smallest amount of tape possible to touch the tiniest edge of the negative.
- An overcast day worked best – but I still could not have the sunlight coming into the window. Instead the light “bounced” off the sheet and was evenly diffused.
So originally, my goal was simply to identify which negatives to have developed and I ended up with over 100 great digital images that are ready to print from my own photo printer! Many negatives were not scanned because I could tell they would not be useful in the lines I am researching (alot of my uncle’s buddies in the Navy), but I can always go back and get them later if needed. And I did not even try to work with the color negatives. Perhaps this winter when everything outside is already white!
With my digital negatives, I can zoom in on faces or crop the photo to be any convenient size, insert them into notes or family tree charts – all for free! The bonus is that the negatives are digitally and physically preserved with the digital copies stored in various places. My family will all be getting a CD burned with all of the final images – which I hope will bring out lots of forgotten family stories and mementos to be shared at the next family reunion. I plan to include a list of items that THEY may not think is helpful to my research, but that I’d love to see!
And to think, this all started with my Uncle telling me, “I really don’t have that much for your genealogy project”!

It is great you found all these historical images in an archive. Just think, that box of negatives and prints was like a “hard drive” for those images. I try to encourage people to print as much of their digital images as possible, so that future generations can pull that “shoebox” out and look at the photos and laugh and tell stories again.
I’m glad you solved your negative problems and only wish that I had such a problem to solve. My mother wasn’t a photo person, so nearly no photos of my childhood and none of my father.
Using your screen as a free (already paid-for, anyway) light box is genius.
My scanner is an ordinary, inexpensive HP flatbed that scans up to legal size. It supposedly does negatives of all sizes, but I don’t have any to experiment with. Perhaps a friend has a flatbed scanner you can experiemnt with.
As for storage solutions of those negatives, I have some links for you.
* Gaylord is a major retailer of library equipment and preservation supplies:
http://www.gaylordmart.com/lobby_gaylordmart.asp?
* American Institute for Conservation of Historic and Artistic Works
http://www.conservation-us.org/
Center of the page buttons:
– Save Your Treasures
– Research and Read
(One of the pamlets:
http://www.conservation-us.org/_data/n_0001/resources/live/photographs.pdf )
* The Library of Congress: Preservation: Caring for Your Photographic Collections
http://www.loc.gov/preserv/care/photo.html
Julia .^_^.