Sometimes, when I read through my notes for an individual or family, I tend to forget that they were actual people and not data in a chart. It helps if I can add their image to my notes.
Other times, my notes are full of information, which may or may not be cited, but I lose track of whether the information comes from an actual document or from a transcript of the document. I like to add thumbnail images to my notes to remind me of exactly what I have.
This week, I’ll talk about resizing and cropping an image. Next week, I’ll talk about different effects that could be applied to an image and then I’ll go over how to place the image into your document.
I rarely have the space to include a full sized image in my document, so I usually need to scale the image down. I love to use Photoshop for this, but I thought I’d go through the steps using Paint since most computers come with the program already installed.
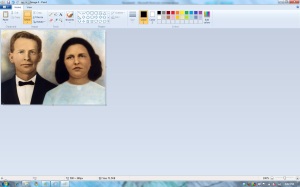
In my folder of images, I begin by right clicking on the image and telling it to open with the Paint program. (You can also open the file from the Paint program, but I like seeing the image before opening it to make sure it’s the image I’m thinking of.) The image will probably be too large to see the whole thing on my screen. So I begin by resizing the image.
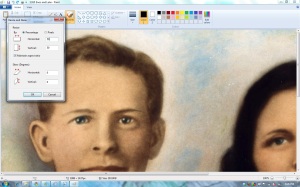
In the toolbar in the top left corner, I click “Resize” or click “Ctrl W”.
On previous versions of Paint, I believe you had to click on the Image tab and then choose Stretch/Skew in the drop down menu. From here, you choose the percentage you want to shrink the image. I usually begin with 50%. (Note that you can choose different percentages for horizontal and vertical, but that would distort the image.)
If I need to reduce it further, I repeat the steps.
If I shrink the image too far, I usually “undo” by hitting “Ctrl Z” rather than trying to resize it to a larger percentage. It doesn’t have to be the exact size that I’ll have in the document, just small enough to paste into the image without it being larger than the paper size. The image can be further adjusted within the document later.
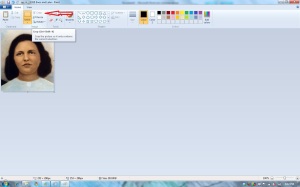
I can also crop a photo to contain a specific part of the image. This could be a single person from a group photo or it could be a line or two from a full page record. To crop a portion, begin by clicking the down arrow under the “Select” button. In the drop down menu, click “Rectangular Selection”.
Once you have drawn the box around the section you’d like to keep, click the “Crop” button at the top and everything that is not in your rectangle will disappear.
Once you have the image resized and cropped, be sure to save it with a different name or you will have lost the original image.
Next week, I’ll go over some fun effects you can use with your photos.


